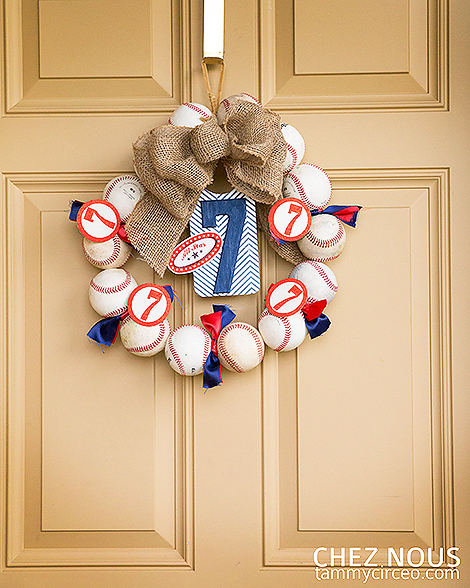
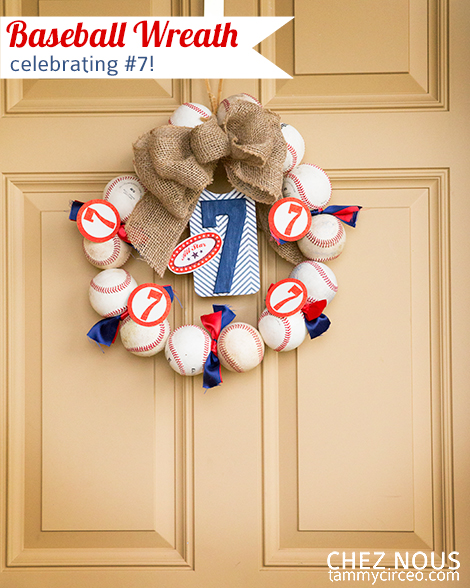
Celebrating #7!
Happy birthday to Jessica Sprague.com! It is a gift to us all that her site got started, that she continued giving us new content, and is now celebrating seven years on the World Wide Web. In celebration, the Create Inspiration Team decided that our theme this month should be simply … The Number Seven.
The #7 is my favorite number! The fact that it is the number my son has worn through his whole baseball career might have something to do with that. He has been a fan of the game since he could recognize the ball. He traded in his teddy bear for a bat when he was 18 months old and has slept in more baseball uniforms than PJs! He has pursued the dream of playing America's game to the point where he is now entering his senior year of playing collegiate baseball.
Because we are such baseball fans and because Ben's number is #7, it was inevitable that I would make this project about baseball. I worried that he would think this a terrible waste of fourteen baseballs, but he really likes it and thinks it's sweet and pretty cool. There goes a tally mark in the "hip" category for this baseball mom!
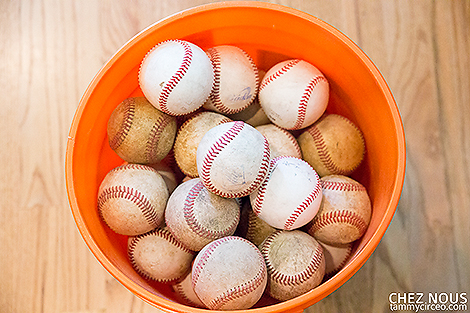
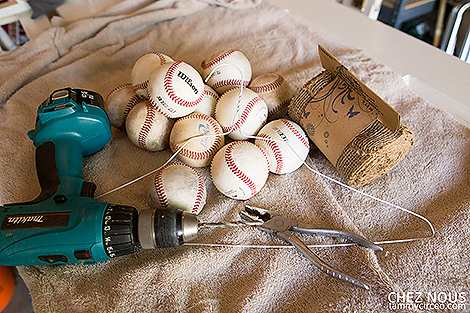
For the last 21 years, the number of baseballs in our home has grown exponentially each year so sparing fourteen for this project wasn't a huge sacrifice. If you don't have at least fourteen baseballs falling out of old baseball bags in your garage, rolling out from under beds in your spare rooms, and rolling around the trunk of your car, you might need to purchase some to complete this wreath. I must say that I love the beat up look of used ones, though, so if you buy some, consider letting the neighborhood kids play a few games with them before making your wreath.
You'll also need a drill with a 1/4-inch bit, pliers, wire cutters, a coat hanger, burlap ribbon, satin ribbon, craft clothespins, a wooden #7, a wooden door hangar, and Dani Mogstad's kits shown below.
Start out by untwisting the coat hanger at the neck and straightening it out as much as possible. Don't cut any part of it off. I've seen tutorials using only 11 balls and cutting the neck off without untwisting it, but that makes for a rather small wreath.
Please note that the white coat hanger shown in this photo is NOT what you want to use as it is not heavy enough to maintain a circle shape. We traded it out for a heavier metal colored one and got a fairly perfect circle wreath … just like a baseball.
Please, for the love of all that is holy, do not attempt to drill through the baseball as my husband is demonstrating in this next photo. I nearly lost what sanity I had left.
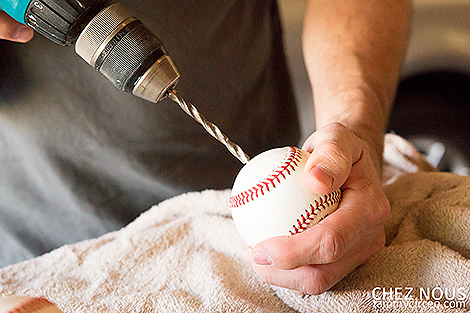
Instead, find something that you can put pressure on and have the drill go past in order to go all the way through the ball. We had an old wire shelf that did the trick, but two pieces of wood would work as well.
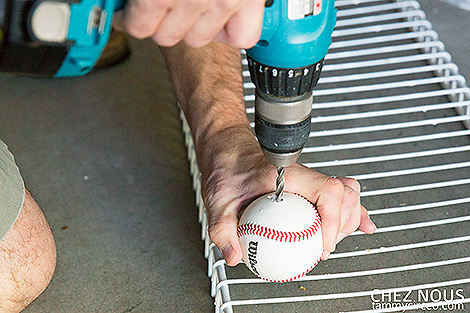
One more note on drilling … A baseball is constructed with a soft core that pretty much turns to dust upon drilling. If you think of using the "back pedal" option on your drill, you'll clog up that hole real quick and the coat hanger won't go through. So you'll have to keep the drill in forward motion, while gripping the ball and pulling it off the drill. This will allow all the "baseball dust" to come out and you'll be able to thread it easily on to the coat hanger.
And one last note … we had to pull the bit out of the drill a bit before tightening it down because ours was a bit short. If you have a bit that is four-inches in length, you should be OK, though.
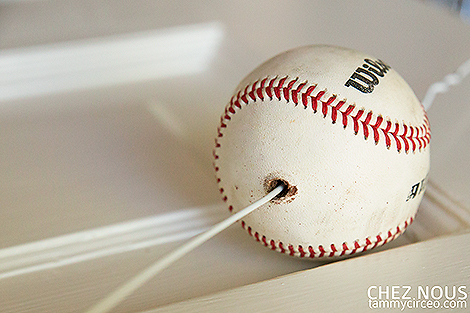
Thread a snake of baseballs …
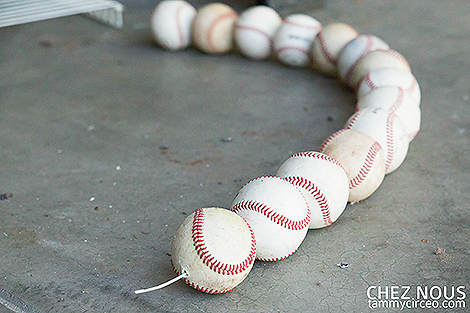
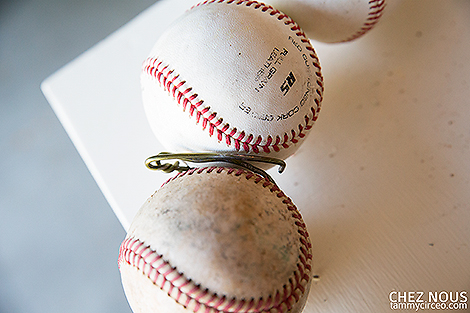
After a few attempts at tying it off, Ken and I figured out that if you bend the coat hanger on each end tight against the baseball, you can keep them from escaping the thread …
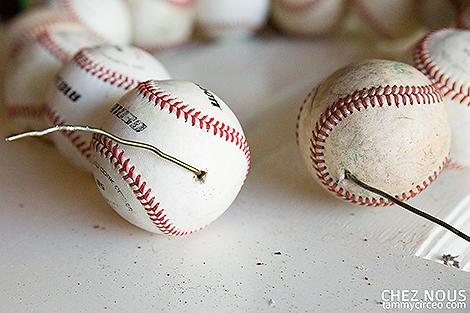
… then you can intertwine the bent pieces and twist them together.
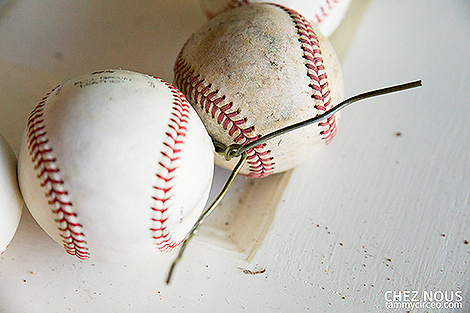
Be sure to bend under any pieces that might prick your hands when the wreath is lifted.
Now for the fun decorating part! I made a burlap bow and tied red and blue ribbons at intervals around the wreath. I used Dani Mogstad's Play Ball kit…

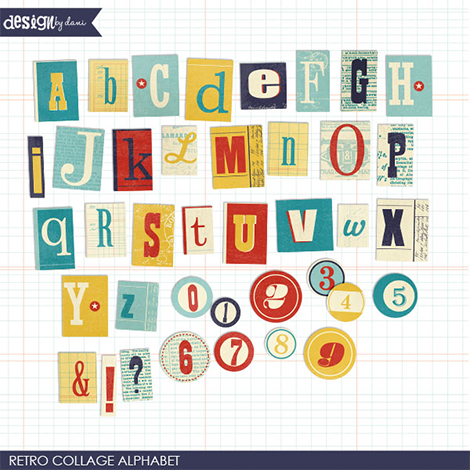
… and her Retro Collage Alphabet
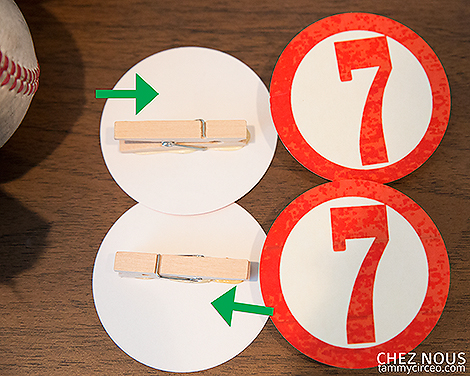
I enlarged and printed the circled "7" from the Retro Collage Alphabet to about 2.5 inches and cut it out, then hot- glued mini clothespins to the backs of four of them. Be sure to glue the clothespins in alternating directions so you can pin them to the opposite sides of the wreath.
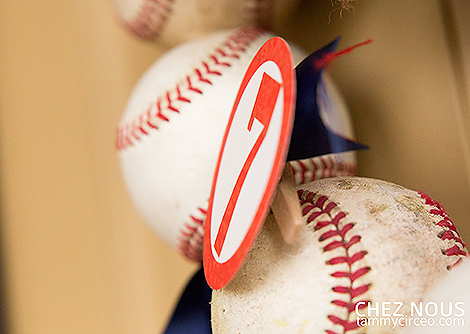
I pinned those circle #7s to the red and blue ribbons.
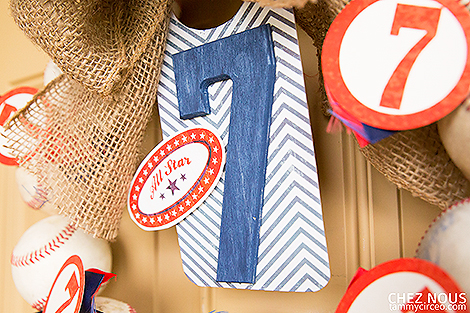
For the large #7 … I covered a wooden door hanger with paper from Dani's Play Ball kit, painted a wooden #7 in a coordinating color, and put a pop dot under the "all star" oval to adhere it.
Et voila … A wreath to celebrate a team, a player, … or Jessica's 7th birthday! Happy Birthday, JessicaSprague.com and SnapClickSupply.com!