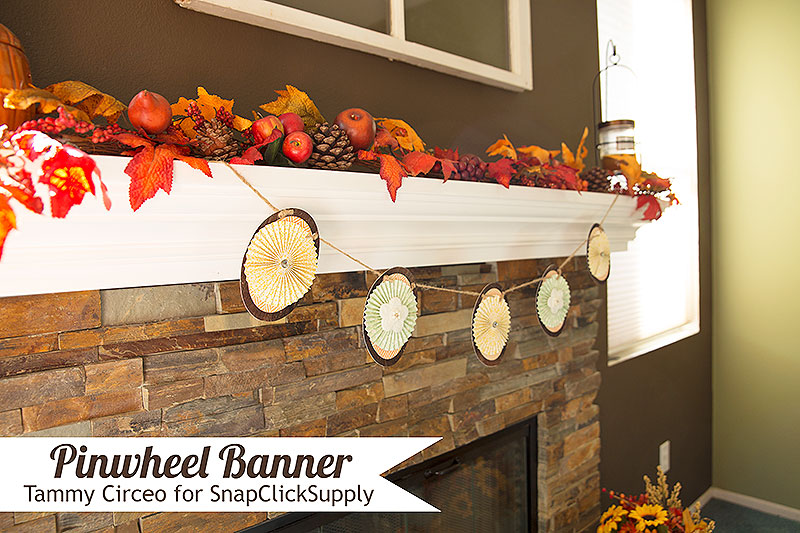
Pinwheel Banner
Are banners overdone yet? I sure hope not because I love them! They are versatile and add a touch of whimsy to seasonal décor. You can make banners using fabric, paper, wood, shapes, figures, photos … anything your imagination allows you to string together.
Last weekend, we visited my brother and his family in Southern California and because my sister-in-law and I love to antique shop, boutique shop, AND craft, we did it all! In one of the shops, we saw a banner that had pinwheels on it and we knew what we would craft when we got home.
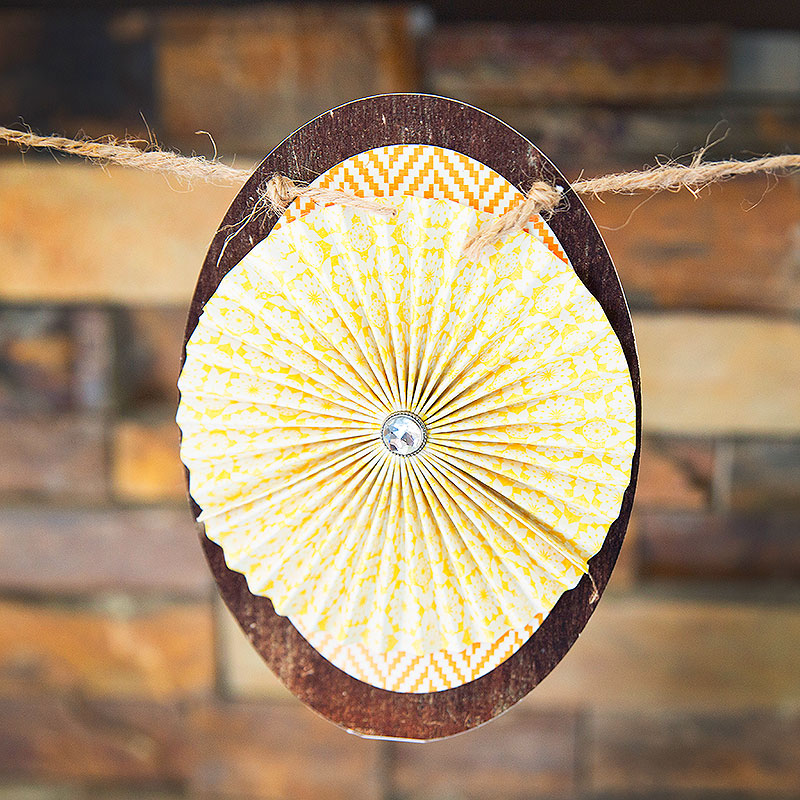
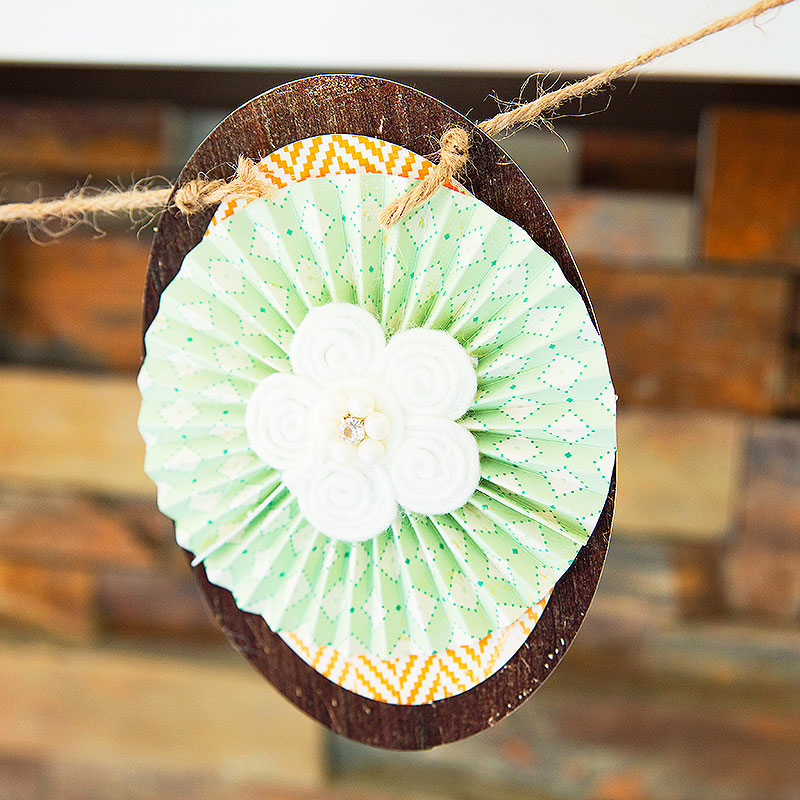
I call this a Pinwheel Banner, but it is more of a circle fan than a pinwheel. It is the bulk of this tutorial since gluing ovals and embellishments together requires little to no brain power and because most of you have probably made many banners, but might not know how to make a circle fan. I used papers from Dani Mogstad's Fall Blessings Paper Pack. Such cozy colors!
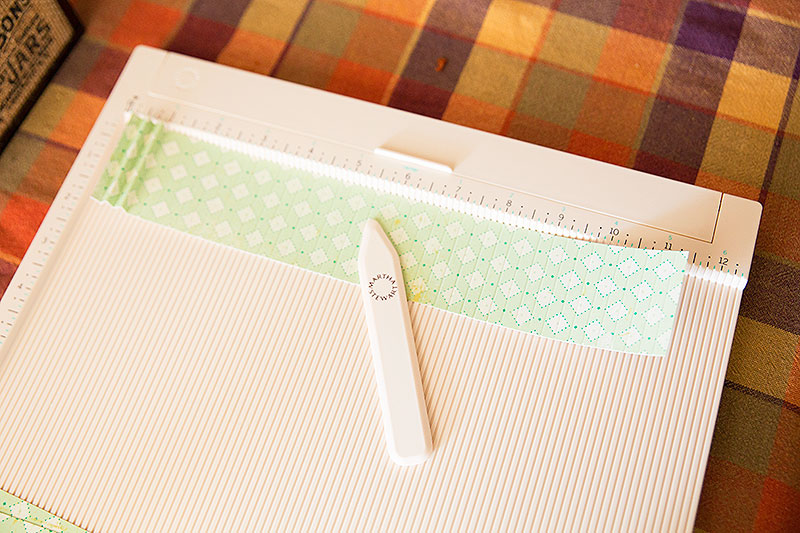
We used the Silhouette machine to cut background ovals that were six inches by four inches so we decided to make the circle fans four inches wide. I cut two inch strips from 12x12 inch paper for the fans.
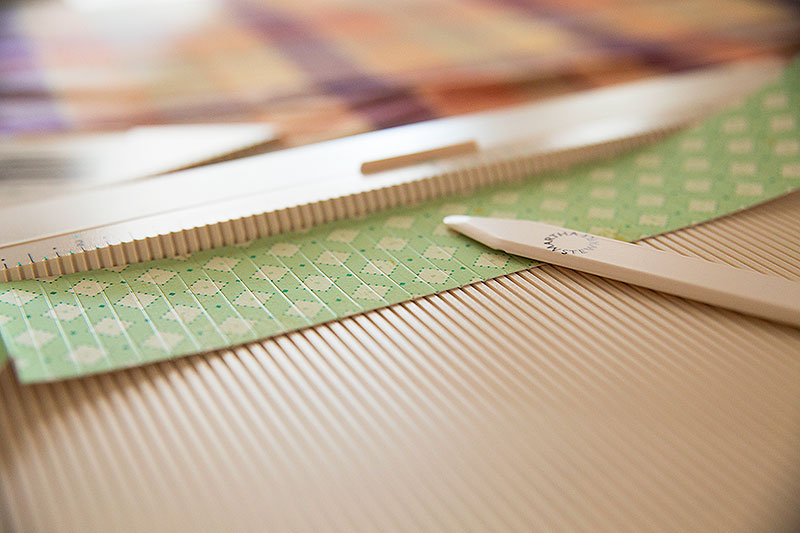
I love Martha Stewart's scoring board. They run about $20, but I recommend doing what I did and using a 50% off coupon at a local craft store. Some paper cutters also have a scoring blade that is super easy to use.
![]()
Score every quarter inch if you want yours to look like mine.
 Begin folding the strip of paper back and forth on the score marks. If you don't have a scoring tool, you can fold the strip back and forth in equal folds. Make the first and last folds TOWARD the side of the paper that you want showing.
For a four-inch circle fan, I found that I actually needed an 18 inch strip so I cut a second strip in half and glued it to the first. Finally, glue the first and last fold together making sure to glue the wrong sides of the paper together.
You'll end up with a pleated tube of paper.
The next task is a bit challenging, but if you persist, you'll meet with success. That's today's Life Lesson. :)
Gather the folds together while gently pressing the center together and eventually pressing the tube flat on a piece of wax paper. Holding as much of it in place with one hand as possible, put a dab of hot glue in the center, then using the other hand, gather the other side of the circle fan and press it tight into the hot glue. Hold it in place while the hot glue dries. There is obviously no photo for this since both of my hands were engaged and I didn't take my tripod to SoCal! However, if you look closely, you can see the hot glue in this next photo.
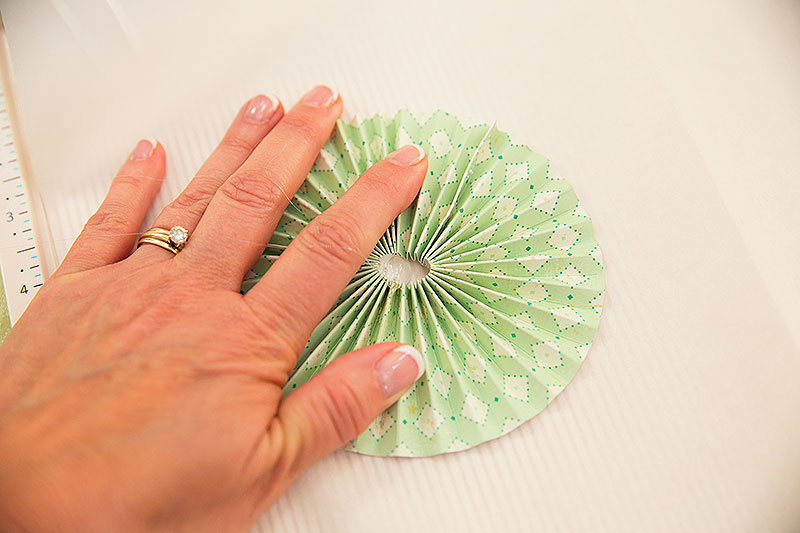
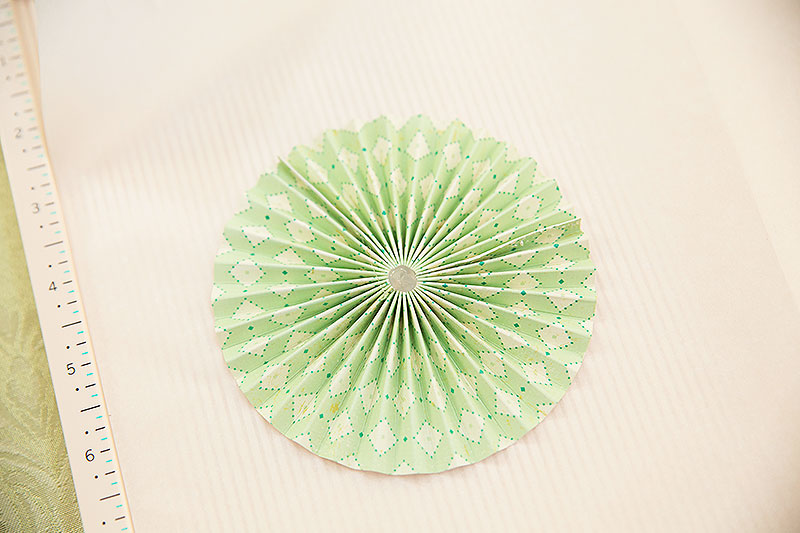
Et voilà! A beautiful circle fan. It easily lifts off of the wax paper.
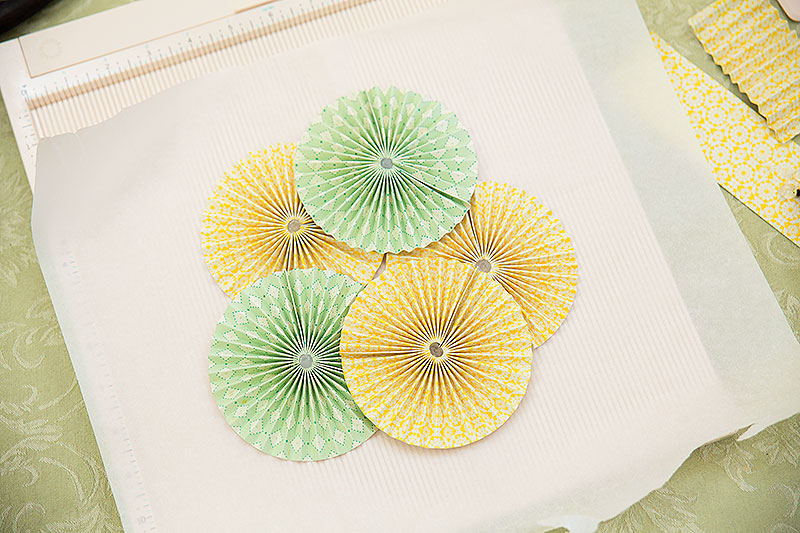
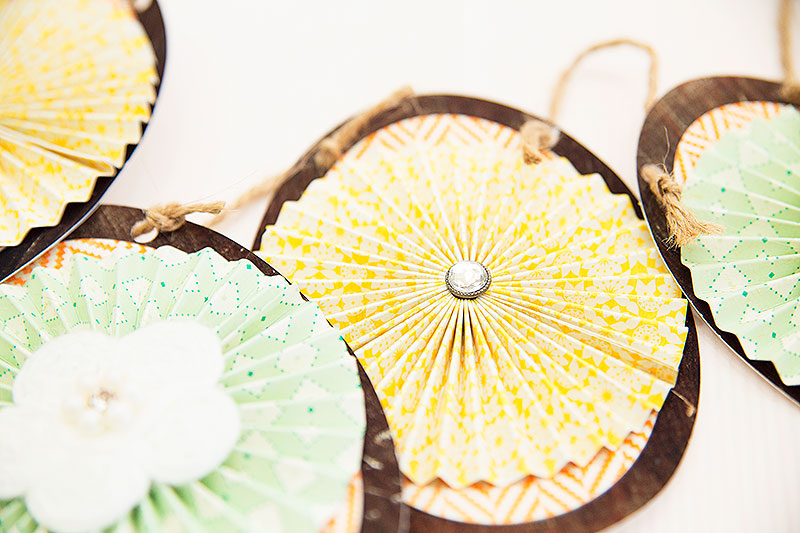
I suggest making banners with odd numbers of pennants because I think they hang prettier. Of course, that choice is yours, but we made two green ones (using the bountiful paper) and three yellow ones (using the together paper).
The background oval is the dark brown rusticwood paper and the smaller oval is the gorgeous orange chevron favoritesweaterpaper.
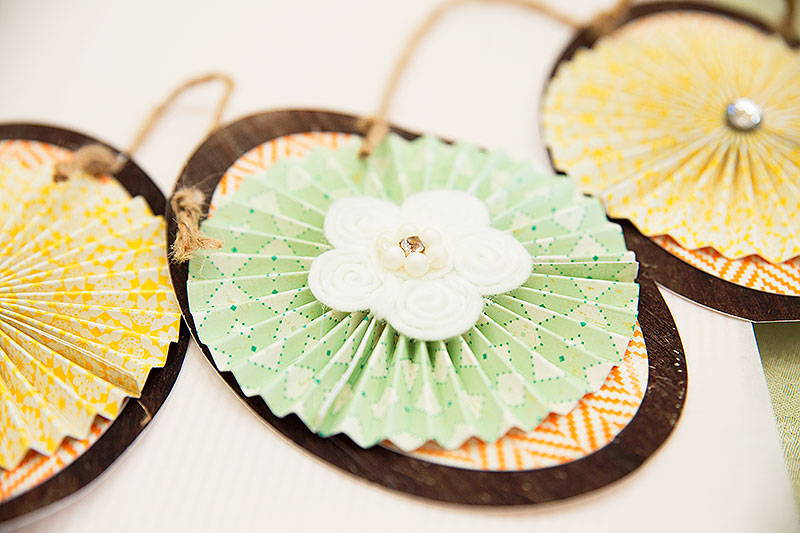
We embellished with sparkly brads …
… and felted flowers.
… then strung them all together with jute …
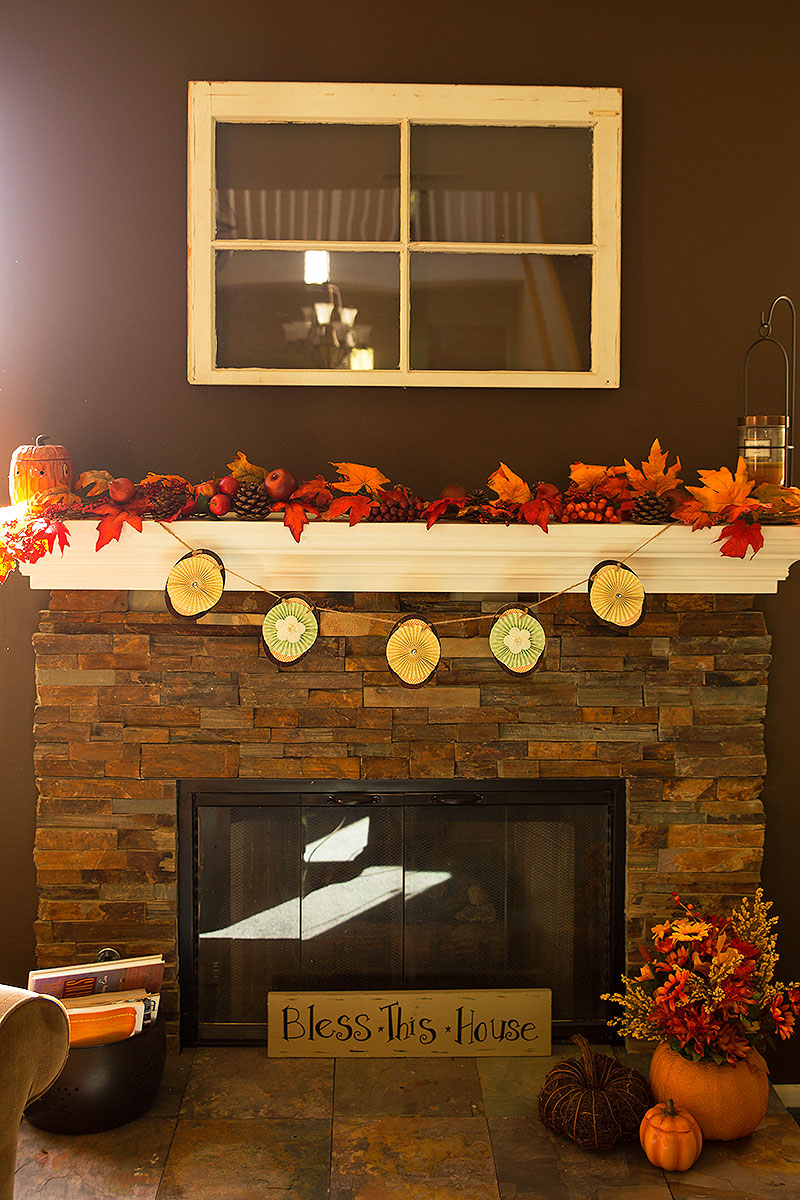
My sister-in-law had already done a gorgeous job of decorating her mantle and the banner fit right in.
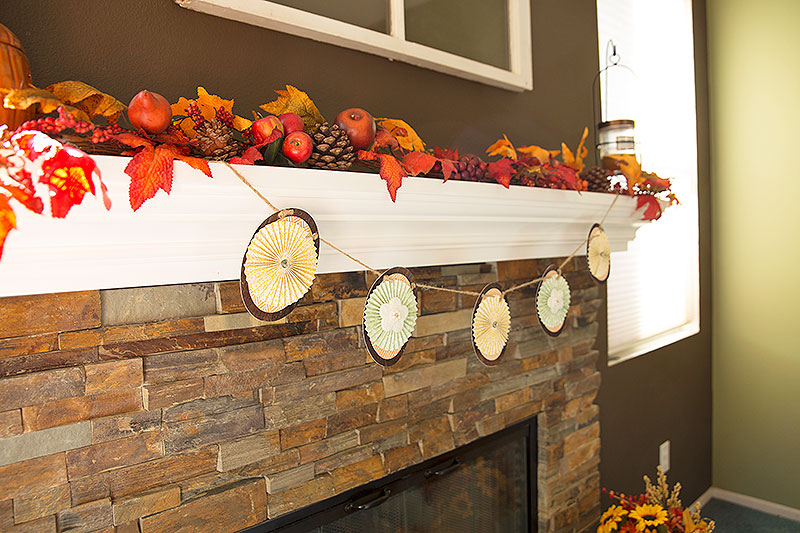
I love her stacked rock fireplace and mantle and it is especially cozy during the Autumn season, don't you think?